Crazy Easy Frugal Desserts: Satisfy Your Sweet Tooth Without Breaking the Bank – Episode #29
Amy
- September 16, 2024
Sweet on a Budget: Crazy Easy Frugal Desserts You’ll Love!
Looking for budget-friendly breakfast ideas that you can meal prep ahead of time? In this video, I’ll show you how to make four delicious and easy breakfast recipes for under $1 per serving! Whether you’re feeding the family or meal prepping for yourself, these breakfasts are healthy, satisfying, and super affordable. Plus, I’ll share my top tips on how to store them for the week and optional add-ins to take them to the next level!
In today’s economy, finding ways to enjoy delicious treats without overspending is more important than ever. Fortunately, frugal cooking can help you stretch your budget while still indulging in your favorite desserts. Whether you’re hosting a family gathering, bringing a dish to a potluck, or just satisfying your sweet tooth, these crazy easy frugal desserts are perfect for any occasion.
In this blog post, we’re going to dive into four incredibly simple and budget-friendly dessert recipes: Chocolate Cream Pie, No-Bake Cheesecake, Cake Mix Cookies, and Dump Cake. Each of these recipes is designed to be quick, easy, and, most importantly, affordable. So, let’s get started!
The Importance of Frugal Cooking
Before we dive into the recipes, let’s talk a little about the concept of frugal cooking. Frugal cooking isn’t just about saving money; it’s about making the most of what you have and finding creative ways to turn simple ingredients into delicious meals and desserts. It’s about using pantry staples, shopping smart, and avoiding food waste.
When it comes to desserts, frugal cooking can help you enjoy sweet treats without the guilt of overspending. By using budget-friendly ingredients and simple techniques, you can create desserts that are just as delicious as their more expensive counterparts. Plus, these recipes are easy enough for anyone to make, whether you’re a seasoned baker or just starting out in the kitchen.
Chocolate Cream Pie: A Rich and Velvety Delight
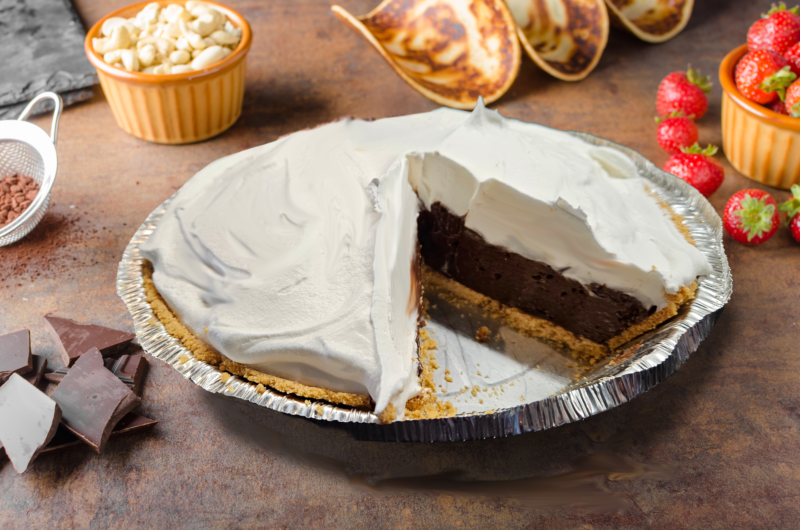
Our first dessert is a rich and velvety Chocolate Cream Pie. This dessert is a chocolate lover’s dream, and it’s incredibly easy to make. With just a few simple ingredients, you can whip up a pie that looks and tastes like it came from a fancy bakery.
Ingredients:
– 1 pre-made pie crust (graham cracker or chocolate)
– 1 package instant chocolate pudding mix
– 2 cups cold milk
– 1 cup whipped topping
– Chocolate shavings or cocoa powder for garnish (optional)
How to Make Chocolate Cream Pie
1. Prepare the Pudding: In a large mixing bowl, whisk together the instant chocolate pudding mix and cold milk. Whisk for about 2 minutes until the pudding thickens. This step is as simple as it gets, and it’s the key to the rich, creamy filling of this pie.
2. Fill the Pie Crust: Pour the thickened pudding mixture into your pre-made pie crust. Use a spatula to spread the pudding evenly, making sure it reaches all the edges of the crust.
3. Chill the Pie: Place the pie in the refrigerator for about 30 minutes to allow the pudding to set. This step is important to ensure that the pie holds its shape when sliced.
4. Add the Topping: Once the pie has set, spread a generous layer of whipped topping over the top. For an extra touch of elegance, you can garnish the pie with chocolate shavings or a light dusting of cocoa powder.
5. Serve and Enjoy: Slice the pie and serve chilled. This Chocolate Cream Pie is perfect for any occasion and is sure to be a hit with chocolate lovers of all ages.
For each of these, you can garnish with whipped cream, fruit, or chocolate shavings if you like, but the base will be delicious with just the pudding mix, milk, and graham crust!
Frugal Tip: Use Pantry Staples
One of the best things about this Chocolate Cream Pie is that it uses pantry staples that you likely already have on hand. Instant pudding mix and pre-made pie crusts are affordable and have a long shelf life, making them perfect for keeping in your pantry for last-minute desserts.
Chocolate Cream Pie
Recipe by AmyCourse: DessertCuisine: AmericanDifficulty: EasyIngredients
1 pre-made pie crust (graham cracker or chocolate)
1 package instant chocolate pudding mix
2 cups cold milk
1 cup whipped topping
Chocolate shavings or cocoa powder for garnish (optional)
Directions
- Prepare the Pudding: In a large mixing bowl, whisk together the instant chocolate pudding mix and cold milk. Whisk for about 2 minutes until the pudding thickens. This step is as simple as it gets, and it’s the key to the rich, creamy filling of this pie.
- Fill the Pie Crust: Pour the thickened pudding mixture into your pre-made pie crust. Use a spatula to spread the pudding evenly, making sure it reaches all the edges of the crust.
- Chill the Pie: Place the pie in the refrigerator for about 30 minutes to allow the pudding to set. This step is important to ensure that the pie holds its shape when sliced.
- Add the Topping: Once the pie has set, spread a generous layer of whipped topping over the top. For an extra touch of elegance, you can garnish the pie with chocolate shavings or a light dusting of cocoa powder.
- Serve and Enjoy: Slice the pie and serve chilled. This Chocolate Cream Pie is perfect for any occasion and is sure to be a hit with chocolate lovers of all ages.
No-Bake Cheesecake: A Creamy, Refreshing Treat
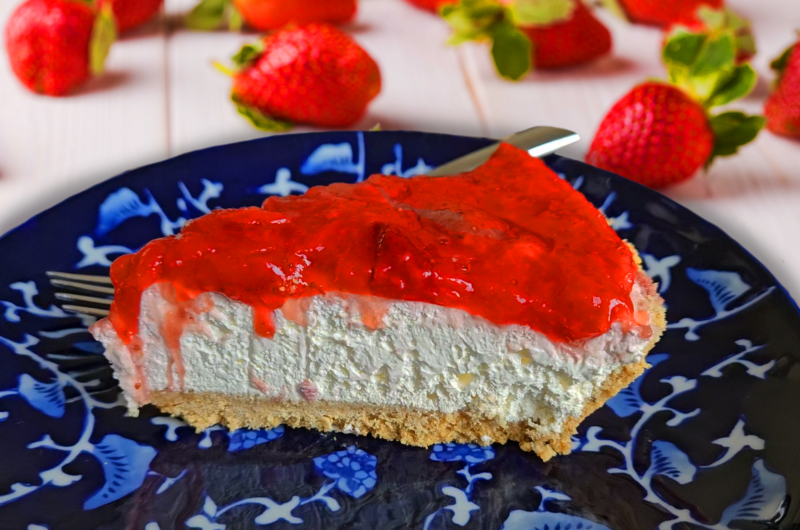
Next up is a No-Bake Cheesecake that’s creamy, tangy, and incredibly refreshing. This dessert is perfect for those hot summer days when you don’t want to turn on the oven, but still crave something sweet and satisfying.
Ingredients:
– 1 pre-made graham cracker crust
– 2 packages (8 oz each) cream cheese, softened
– 1 cup powdered sugar
– 1 teaspoon vanilla extract
– 1 cup whipped topping
– Fresh fruit or fruit pie filling for topping
How to Make No-Bake Cheesecake
1. Prepare the Cheesecake Filling: In a large mixing bowl, beat together the softened cream cheese, powdered sugar, and vanilla extract until smooth and creamy. It’s important to make sure the cream cheese is fully softened to avoid lumps in your cheesecake.
2. Fold in the Whipped Topping: Once the cream cheese mixture is smooth, gently fold in the whipped topping until well combined. This will give the cheesecake a light, airy texture.
3. Fill the Crust: Spread the cheesecake mixture evenly into the pre-made graham cracker crust. Use a spatula to smooth the top.
4. Chill the Cheesecake: Place the cheesecake in the refrigerator to chill for at least 4 hours, or until it’s firm. This step allows the cheesecake to set and develop its full flavor.
5. Add the Topping: Once the cheesecake is set, top it with fresh fruit or fruit pie filling. Berries, cherries, or even a mix of fruits work wonderfully with the creamy cheesecake filling.
6. Serve and Enjoy: Slice the cheesecake and serve chilled. This No-Bake Cheesecake is a light and refreshing dessert that’s perfect for summer gatherings or anytime you want a sweet treat without the hassle of baking.
Frugal Tip: Buy in Bulk
Cream cheese and whipped topping are often on sale at grocery stores, especially during the holidays. Consider buying these ingredients in bulk when they’re on sale and freezing them for later use. This way, you’ll always have the ingredients on hand for a quick and easy dessert like this No-Bake Cheesecake.
No Bake Cheesecake
Recipe by AmyCourse: DessertCuisine: AmericanDifficulty: EasyIngredients
1 pre-made graham cracker crust
2 packages (8 oz each) cream cheese, softened
1 cup powdered sugar
1 teaspoon vanilla extract
1 cup whipped topping
Fruit topping, optional
Directions
- Prepare the Cheesecake Filling: In a large mixing bowl, beat together the softened cream cheese, powdered sugar, and vanilla extract until smooth and creamy. It’s important to make sure the cream cheese is fully softened to avoid lumps in your cheesecake.
- Fold in the Whipped Topping: Once the cream cheese mixture is smooth, gently fold in the whipped topping until well combined. This will give the cheesecake a light, airy texture.
- Fill the Crust: Spread the cheesecake mixture evenly into the pre-made graham cracker crust. Use a spatula to smooth the top.
- Chill the Cheesecake: Place the cheesecake in the refrigerator to chill for at least 4 hours, or until it’s firm. This step allows the cheesecake to set and develop its full flavor.
- Add the Topping: Once the cheesecake is set, top it with fresh fruit or fruit pie filling. Berries, cherries, or even a mix of fruits work wonderfully with the creamy cheesecake filling.
- Serve and Enjoy: Slice the cheesecake and serve chilled. This No-Bake Cheesecake is a light and refreshing dessert that’s perfect for summer gatherings or anytime you want a sweet treat without the hassle of baking.
Cake Mix Cookies: A Quick and Versatile Dessert
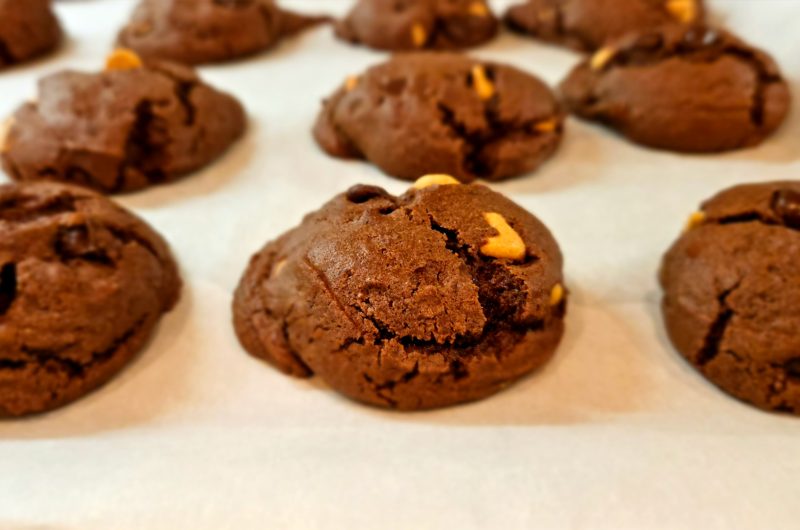
Cake Mix Cookies are one of my favorite dessert hacks because they’re so quick and versatile. With just a few ingredients, you can whip up a batch of cookies that are soft, chewy, and absolutely delicious. Plus, you can customize them with your favorite mix-ins to create endless flavor combinations.
Ingredients:
– 1 box cake mix (any flavor)
– 1/2 cup vegetable oil
– 2 eggs
– Optional: chocolate chips, sprinkles, or other mix-ins
How to Make Cake Mix Cookies
1. Prepare the Dough: In a large mixing bowl, combine the cake mix, vegetable oil, and eggs. Stir until the ingredients are fully combined and the dough forms.
2. Add Mix-Ins: If you want to add some extra flavor or texture to your cookies, now is the time to fold in your favorite mix-ins. Chocolate chips, sprinkles, nuts, or even dried fruit all work well.
3. Scoop the Dough: Use a spoon or cookie scoop to drop spoonfuls of dough onto a baking sheet lined with parchment paper. Space the cookies about 2 inches apart to allow for spreading.
4. Bake the Cookies: Bake the cookies in a preheated oven at 350°F for 10-12 minutes, or until the edges are lightly golden. Be careful not to overbake, as these cookies are best when they’re soft and chewy.
5. Cool and Serve: Let the cookies cool on the baking sheet for a few minutes before transferring them to a wire rack to cool completely. These Cake Mix Cookies are perfect for last-minute gatherings or whenever you need a quick and easy treat.
Additional Ideas:
Cake mix cookies are a great way to make easy and tasty treats with minimal ingredients. Here are some ideas and combinations to try:
1. Classic Cake Mix Cookies:
– 1 box of yellow cake mix
– 1/2 cup vegetable oil
– 2 large eggs
– Optional: 1 cup chocolate chips or sprinkles
2. Chocolate Cake Mix Cookies:
– 1 box of chocolate cake mix
– 1/2 cup melted butter
– 2 large eggs
– Optional: 1 cup white chocolate chips or chopped nuts
3. Red Velvet Cookies:
– 1 box of red velvet cake mix
– 1/2 cup vegetable oil
– 2 large eggs
– Optional: 1 cup cream cheese chips or white chocolate chips
4. Lemon Cake Mix Cookies:
– 1 box of lemon cake mix
– 1/2 cup melted butter
– 2 large eggs
– Optional: 1 cup lemon zest or white chocolate chips
5. Funfetti Cake Mix Cookies:
– 1 box of Funfetti cake mix
– 1/2 cup vegetable oil
– 2 large eggs
– Optional: Add extra sprinkles for more color and fun
6. Pumpkin Spice Cookies:
– 1 box of spice cake mix
– 1 can of pumpkin puree (15 oz)
– 1/2 cup chocolate chips (optional)
7. Peanut Butter Cake Mix Cookies:
– 1 box of yellow cake mix
– 1/2 cup peanut butter
– 2 large eggs
– Optional: 1/2 cup chopped peanuts or peanut butter chips
8. Mint Chocolate Chip Cookies:
– 1 box of chocolate cake mix
– 1/2 cup melted butter
– 2 large eggs
– Optional: 1 cup mint chocolate chips or crushed peppermint candies
9. Coconut Lime Cookies:
– 1 box of white cake mix
– 1/2 cup melted butter
– 2 large eggs
– Optional: 1 cup shredded coconut and lime zest
10. Carrot Cake Mix Cookies:
– 1 box of carrot cake mix
– 1/2 cup melted butter
– 2 large eggs
– Optional: 1/2 cup raisins or chopped walnuts
11. S’mores Cookies:
– 1 box of chocolate cake mix
– 1/2 cup melted butter
– 2 large eggs
– Optional: 1 cup mini marshmallows, 1/2 cup crushed graham crackers, and 1/2 cup chocolate chips
Each of these combinations is simple to make—just mix the cake mix with the oil or butter and eggs, add any optional ingredients, and bake according to your cake mix package directions. Enjoy experimenting with these fun and easy cookies!
Frugal Tip: Use What You Have
One of the best things about Cake Mix Cookies is that you can use whatever cake mix you have on hand. Whether it’s chocolate, vanilla, or something more unique like lemon or spice, these cookies are a great way to use up leftover cake mix. Plus, the addition of mix-ins allows you to get creative with flavors without spending extra money.
Cake Mix Cookies
Recipe by AmyCourse: cookiesCuisine: AmericanDifficulty: EasyIngredients
1 box cake mix
1/2 cup vegetable oil
2 eggs
Chips, sprinkles (optional)
Directions
- Prepare the Dough: In a large mixing bowl, combine the cake mix, vegetable oil, and eggs. Stir until the ingredients are fully combined and the dough forms.
- Add Mix-Ins: If you want to add some extra flavor or texture to your cookies, now is the time to fold in your favorite mix-ins. Chocolate chips, sprinkles, nuts, or even dried fruit all work well.
- Scoop the Dough: Use a spoon or cookie scoop to drop spoonfuls of dough onto a baking sheet lined with parchment paper. Space the cookies about 2 inches apart to allow for spreading.
- Bake the Cookies: Bake the cookies in a preheated oven at 350°F for 10-12 minutes, or until the edges are lightly golden. Be careful not to overbake, as these cookies are best when they’re soft and chewy.
- Cool and Serve: Let the cookies cool on the baking sheet for a few minutes before transferring them to a wire rack to cool completely. These Cake Mix Cookies are perfect for last-minute gatherings or whenever you need a quick and easy treat.
Dump Cake: The Easiest Dessert You’ll Ever Make
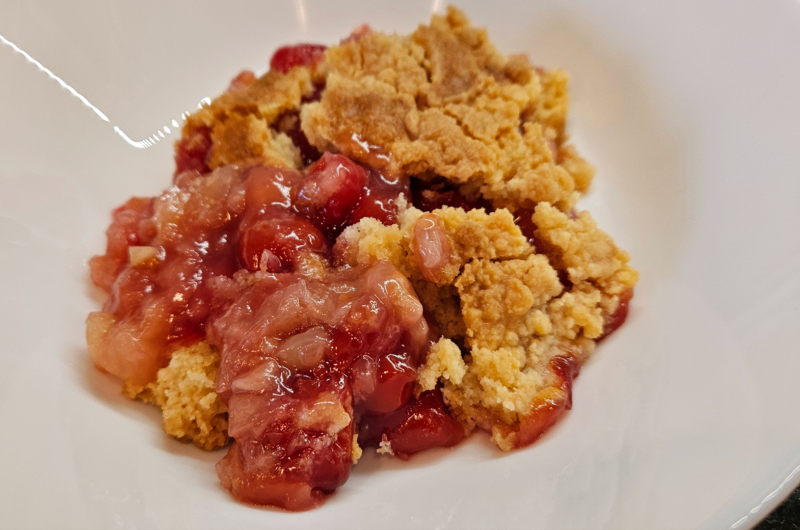
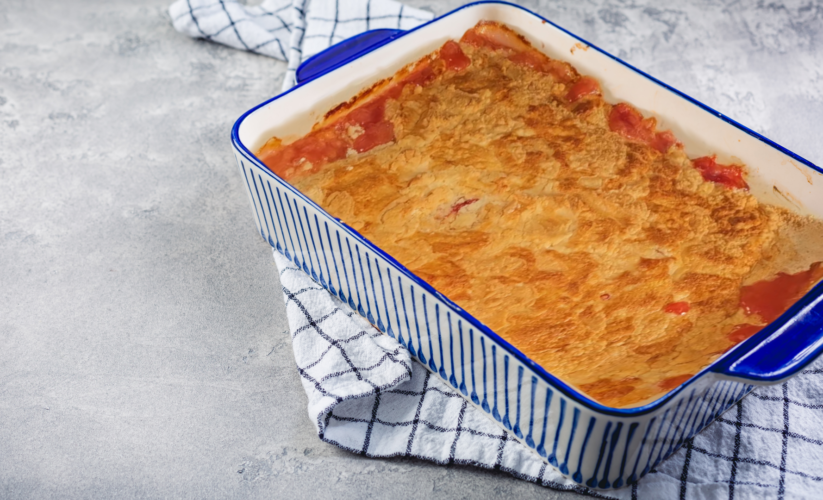
Last but not least, we have the Dump Cake—a dessert that’s so simple, it almost feels like cheating. With just three ingredients, you can create a warm, gooey, and incredibly delicious cake that’s perfect for any occasion.
Ingredients:
– 1 can fruit pie filling (any flavor)
– 1 box yellow or white cake mix
– 1/2 cup melted butter
How to Make Dump Cake
1. Prepare the Baking Dish: Start by preheating your oven to 350°F. Grease a 9×13-inch baking dish with butter or cooking spray.
2. Add the Fruit Filling: Spread the fruit pie filling evenly across the bottom of the prepared baking dish. You can use any flavor of pie filling you like—cherry, apple, blueberry, or peach all work well.
3. Add the Cake Mix: Sprinkle the dry cake mix evenly over the top of the fruit filling. Make sure the cake mix covers the fruit completely, but don’t stir.
4. Add the Butter: Drizzle the melted butter over the top of the cake mix. The butter will soak into the cake mix as it bakes, creating a golden, crispy topping.
5. Bake the Cake: Bake the Dump Cake in the preheated oven for about 45 minutes, or until the top is golden brown and the filling is bubbling around the edges.
6. Serve and Enjoy: Let the cake cool slightly before serving. Dump Cake is best served warm, and it pairs wonderfully with a scoop of vanilla ice cream or a dollop of whipped cream.
Additional Ideas:
1. Peach Cobbler Dump Dessert:
– 1 can of peach slices (in syrup or juice)
– 1 box of yellow cake mix
– 1 stick of butter
– Optional: sprinkle of cinnamon or nutmeg
2. Cherry Dump Dessert:
– 1 can of cherry pie filling
– 1 box of chocolate cake mix
– 1 stick of butter
3. Apple Dump Dessert:
– 1 can of apple pie filling
– 1 box of spice cake mix
– 1 stick of butter
– Optional: add a dash of cinnamon or apple pie spice
4. Blueberry Dump Dessert:
– 1 can of blueberry pie filling
– 1 box of yellow or lemon cake mix
– 1 stick of butter
5. Mixed Berry Dump Dessert:
– 1 can of mixed berries (like raspberries, blackberries, and blueberries in syrup)
– 1 box of white or yellow cake mix
– 1 stick of butter
6. Pineapple Dump Dessert:
– 1 can of crushed pineapple (with juice)
– 1 box of yellow cake mix
– 1 stick of butter
7. Strawberry Dump Dessert:
– 1 can of strawberry pie filling
– 1 box of white or yellow cake mix
– 1 stick of butter
8. Mango Dump Dessert:
– 1 can of mango slices (in syrup or juice)
– 1 box of yellow cake mix
– 1 stick of butter
These combinations can be adjusted based on personal taste preferences, and you can experiment with different cake mix flavors to create variations. Enjoy your easy and delicious dump desserts!
Frugal Tip: Shop Smart
Dump Cake is one of those desserts where you can really save money by shopping smart. Keep an eye out for sales on canned fruit pie filling
and cake mix, especially around the holidays. You can stock up on these pantry staples when they’re discounted, ensuring you always have the ingredients on hand for a quick and easy dessert.
Delicious Desserts on a Dime
Frugal cooking doesn’t mean you have to sacrifice flavor or quality, especially when it comes to desserts. These four crazy easy frugal desserts—Chocolate Cream Pie, No-Bake Cheesecake, Cake Mix Cookies, and Dump Cake—are proof that you can enjoy delicious, indulgent treats without breaking the bank.
The Joy of Simple Ingredients
One of the best things about these desserts is that they rely on simple, affordable ingredients that you likely already have in your pantry or can easily find at your local grocery store. By keeping your kitchen stocked with these budget-friendly staples, you can whip up a delicious dessert at a moment’s notice.
Make It Your Own
Another great aspect of these recipes is their versatility. Whether you’re customizing your Cake Mix Cookies with different mix-ins, choosing your favorite fruit filling for the Dump Cake, or adding a unique topping to your No-Bake Cheesecake, these desserts offer plenty of opportunities to get creative in the kitchen without spending extra money.
Share Your Creations
If you try any of these frugal desserts, I’d love to hear how they turned out! Share your creations on social media using the hashtag #TheEmptyPantry and tag me so I can see your delicious dishes. And if you have any favorite frugal cooking tips or dessert variations of your own, feel free to share them in the comments below.
Thank you for joining me on this sweet journey through frugal cooking! Don’t forget to subscribe to ‘The Empty Pantry’ for more budget-friendly recipes and cooking tips. Until next time, happy baking!
Dump Dessert
Recipe by AmyCourse: DessertCuisine: AmericanDifficulty: EasyIngredients
1 can fruit pie filling (any flavor)
1 box yellow or white cake mix
1/2 cup butter
Directions
- Prepare the Baking Dish: Start by preheating your oven to 350°F. Grease a 9x13-inch baking dish with butter or cooking spray.
- Add the Fruit Filling: Spread the fruit pie filling evenly across the bottom of the prepared baking dish. You can use any flavor of pie filling you like—cherry, apple, blueberry, or peach all work well.
- Add the Cake Mix: Sprinkle the dry cake mix evenly over the top of the fruit filling. Make sure the cake mix covers the fruit completely, but don’t stir.
- Add the Butter: place cut butter over the top of the cake mix. The butter will soak into the cake mix as it bakes, creating a golden, crispy topping.
- Bake the Cake: Bake the Dump Cake in the preheated oven for about 45 minutes, or until the top is golden brown and the filling is bubbling around the edges.
- Serve and Enjoy: Let the cake cool slightly before serving. Dump Cake is best served warm, and it pairs wonderfully with a scoop of vanilla ice cream or a dollop of whipped cream.


